How to Iron a Shirt?
Wrinkled shirts are a real problem. You pull one out of the closet, and it looks like it spent a week crumpled at the bottom of a bag. Not a great start to the day.
The good news? Ironing a shirt is one of those skills anyone can pick up fast. Once you know the steps, you’ll be done in under ten minutes — and your shirts will look like they just came back from a dry cleaner.
This guide walks you through every step. From setting up your ironing board to pressing the collar just right. No experience needed.
Let’s get into it.
Why Ironing Your Shirt Actually Matters
A well-ironed shirt changes how you look and how you feel. It signals that you pay attention to the small stuff. Job interview, date night, or just a regular Tuesday at the office — a crisp shirt always makes a good impression.
Ironing also helps your shirts last longer. It removes the stress fibers that form when fabric stays wrinkled. So you’re not just looking good — you’re also taking care of your clothes.
Skipping the iron might save five minutes today. But over time, your shirts start to look worn and tired even when they’re clean.
What You Need Before You Start
You don’t need a lot of gear. But having the right tools makes the whole process smoother.
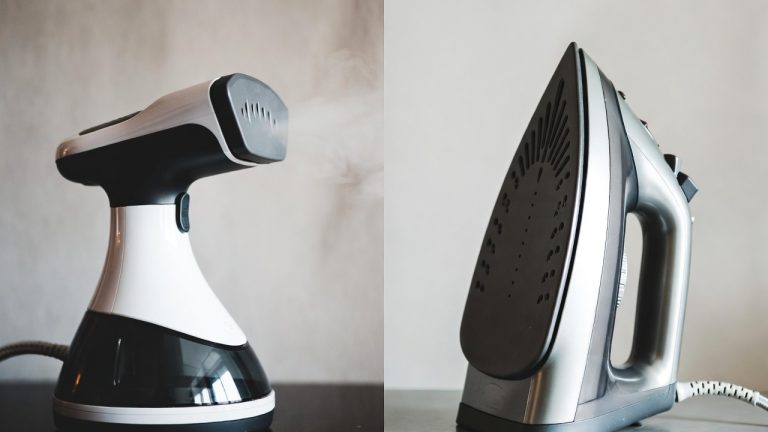
A good iron. You don’t need the most expensive one on the market. A basic steam iron with adjustable heat settings works perfectly fine. Make sure it heats up evenly and produces a decent amount of steam.
An ironing board. A sturdy, padded board gives you a flat surface to work on. It helps the fabric lie smooth so you can press out wrinkles without creating new ones. If you don’t have one, a thick towel on a hard flat surface can work in a pinch — but a proper board is worth it.
Water. Fill the iron’s water tank before you start. Steam is your best friend when ironing. It relaxes the fabric fibers and makes wrinkles much easier to remove.
Your shirt. Slightly damp shirts are the easiest to iron. If your shirt came straight from the dryer and it’s fully dry, that’s fine too — the steam from the iron will handle it.
A spray bottle (optional). If your shirt is too dry, a quick spritz of water helps loosen tough wrinkles before you press.
How to Read the Care Label
Before you touch the iron to your shirt, check the care label. It’s usually on the inside back collar or the inner side seam.
The label uses small symbols. The iron symbol tells you what heat level to use. Here’s a quick breakdown:
- One dot — Low heat. For delicate fabrics like silk or synthetic blends.
- Two dots — Medium heat. For wool and synthetic fabrics.
- Three dots — High heat. For cotton and linen.
If the label shows an iron with an X through it, don’t iron that shirt at all. Some fabrics just can’t handle heat.
Ignoring the care label is the most common ironing mistake. It can cause permanent damage — shiny marks, scorch burns, or melted fabric. Always check first.
Setting the Right Temperature
Get the temperature wrong and you’ll either end up with a shirt that still looks wrinkled or one that’s permanently damaged.
Here’s a simple guide:
- Silk, synthetic, nylon — Use the lowest setting. These fabrics melt easily.
- Wool — Use medium heat. Always iron on the reverse side or with a pressing cloth in between.
- Cotton — Use high heat. Cotton handles the heat well and actually needs it to smooth out properly.
- Linen — Use the highest setting. Linen is stubborn and needs real heat to release wrinkles.
- Blended fabrics — Go with the lower of the two fabric settings to stay safe.
When in doubt, start low. You can always increase the heat if the wrinkles aren’t coming out. But you can’t undo damage from too much heat.
How to Set Up Your Ironing Board
Set up your ironing board at a comfortable height. It should sit around waist or hip level. If it’s too low, you’ll end up hunching over and tiring out your back. Too high and you lose control.
Make sure the board is stable and not wobbling. Place it near a power outlet so the iron cord can reach without pulling tight.
Lay a clean cloth over the board if the cover looks worn or dirty. You don’t want any dirt or residue transferring to your clean shirt.
Plug in your iron and let it heat up fully before you start. Most irons take one to three minutes to reach temperature. Don’t rush this step. An iron that hasn’t fully heated will drag and tug on the fabric.
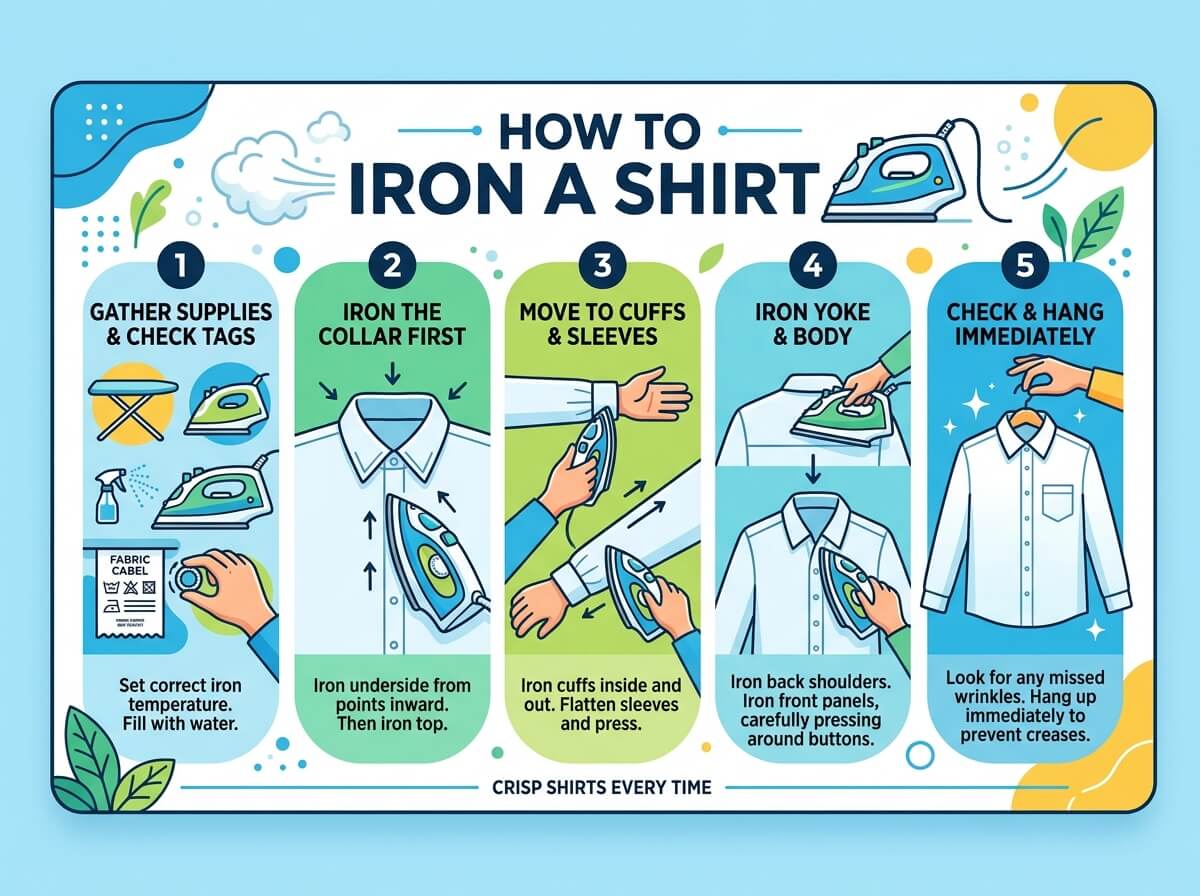
The Right Order to Iron a Shirt
This part matters more than most people think. Ironing in the wrong order means you’ll re-wrinkle parts you already pressed.
Follow this sequence every time:
- Collar
- Cuffs
- Sleeves
- Back panel
- Front panels
Work from the smaller, detailed pieces first — then move to the larger flat areas. This way, you’re not accidentally creasing the big sections while trying to maneuver the shirt around the board.
Step 1: Iron the Collar
Pop the collar up so it stands flat. Lay it down on the wide end of the ironing board.
Start ironing from the collar tips and move toward the center. This avoids pushing tiny wrinkles into sharp points at the tips. Flip the collar over and press the other side too.
Once both sides are smooth, fold the collar down and run the iron lightly over the fold to keep the crease neat.
The collar is the most visible part of any shirt. Get it right and the rest of the shirt looks even better.
Step 2: Iron the Cuffs
Unbutton the cuffs fully. Lay one cuff flat on the board.
Open it up so the inside of the cuff faces up. Iron the inside first. Then flip it over and iron the outside.
Pay attention to the area around the buttons. Use the tip of the iron to get into the tight spots without pressing on the button itself.
Once the cuff is done, lay it flat and press the edge to give it a sharp, clean look.
Do both cuffs before moving to the sleeves.
Step 3: Iron the Sleeves
Lay the sleeve flat on the board. Pull it gently so the seam runs along the edge and the fabric lies smooth with no bunching.
Iron the top of the sleeve first. Then flip it and iron the underside.
A lot of people like a crisp crease running along the top edge of the sleeve. To get this, align the seams carefully and press firmly along the top fold. This gives the shirt a sharp, professional look.
If you prefer no crease — more casual look — just press the sleeve smooth without pressing along any edge fold.
Do both sleeves the same way.
Step 4: Iron the Back Panel
Slip the back of the shirt over the narrow end of the ironing board. The pointed tip of the board helps you work around the yoke — that’s the panel across the top of the back.
Start at the yoke. Press from side to side, working downward.
Then move to the main back panel. Use long, smooth strokes from top to bottom. Keep the fabric taut with your free hand so new wrinkles don’t form as you go.
If your shirt has a pleat at the center back, fold it neatly and press it flat.
Step 5: Iron the Front Panels
Now move to the front of the shirt. Start with the button placket — that’s the strip where the buttons are sewn.
Use the tip of the iron to press carefully between each button. Take your time here. Rushing means you might catch a button with the iron’s soleplate, which can scorch the fabric or crack the button.
Then press the rest of the front panel using long strokes. Move from the shoulder downward. Keep the fabric smooth with your other hand.
Do the other front panel the same way.
If the shirt has a chest pocket, use the tip of the iron to press around the edges and inside the pocket opening.
Dealing With Stubborn Wrinkles
Sometimes you press over a wrinkle and it’s still there. Don’t panic. There are a few simple fixes.
Add more steam. Most irons have a steam burst button. Hold the iron just above the stubborn area and press the steam button. Let the steam penetrate the fabric, then press again.
Spritz with water. A light mist from a spray bottle adds just enough moisture to relax tight wrinkles. Press immediately after.
Use a pressing cloth. For tricky fabrics, lay a thin cotton cloth between the iron and the shirt. This spreads the heat more evenly and prevents shine marks.
Iron from the inside. For embroidered or printed areas, always iron from the wrong side of the fabric. Heat can damage decorations on the outside of the shirt.
Common Ironing Mistakes to Avoid
Even simple tasks have their pitfalls. Here are the ones beginners run into most often.
Ironing a dirty shirt. Heat sets stains permanently. Always wash your shirt before ironing.
Using too much pressure. You don’t need to lean into the iron. Let the heat and steam do the work. Pressing too hard can flatten the fabric texture and leave shiny marks.
Leaving the iron sitting still on the fabric. Keep the iron moving at all times. A stationary hot iron will scorch or burn the fabric in seconds.
Starting with the wrong temperature. Always start cooler than you think you need, especially with unknown fabrics. You can always turn the heat up. You can’t fix a scorch mark.
Ignoring the grain of the fabric. Iron in the direction of the weave — usually lengthwise along the shirt. Going across the grain can distort the shape.
Overfilling the water tank. Fill it to the marked line, not beyond. Too much water can spit out in droplets and leave water stains on the fabric.
How to Iron a Dress Shirt vs. a Casual Shirt
The process is mostly the same, but there are a few differences worth knowing.
Dress shirts — usually made from finer cotton or cotton blends — need a little more care. Use medium-high heat with steam. Pay extra attention to the collar and cuffs since these are the most visible parts. Dress shirts often have a stiff, structured feel, and the right ironing technique brings that out.
Casual shirts — like Oxford cloth button-downs or flannel shirts — are more forgiving. You can use slightly less heat. And if you prefer a relaxed, lived-in look, you don’t need to press every inch perfectly. Just smooth out the major wrinkles and you’re done.
Linen shirts — iron these when they’re slightly damp. Dry linen resists the iron. Using steam helps a lot. Don’t worry about getting linen perfectly wrinkle-free — it will crease again the moment you put it on. A light press is all you need.
Polyester or synthetic shirts — use low heat only. Synthetic fabrics can melt at high temperatures. Keep the iron moving fast and use light pressure.
How to Keep Your Shirt Wrinkle-Free After Ironing
All that work deserves to last as long as possible.
Hang the shirt immediately. The moment you’re done ironing, put the shirt on a hanger. Don’t fold it. Don’t toss it on a chair. Hang it up right away.
Use a proper hanger. Wide-shouldered hangers keep the shirt’s shape better than thin wire hangers. Wire hangers can stretch the shoulders and leave marks.
Let it cool before wearing. Give the shirt five minutes to cool and dry fully. If you put it on while it’s still slightly warm or damp from the steam, the fabric can re-wrinkle fast.
Store in a cool, dry place. Heat and humidity cause wrinkles. A cool, ventilated wardrobe keeps shirts in better shape between wearings.
Don’t over-stuff your wardrobe. Shirts crammed together stay crinkled. Give each shirt a little breathing room.
Quick Tips for Faster Ironing
Once you get comfortable with the basics, these small habits make the whole routine faster and easier.
- Iron in batches. Set up the board once and iron five or six shirts at a time. It’s much more efficient than doing one shirt every morning.
- Iron shirts inside-out when possible. Especially for dark-colored shirts. Ironing the inside reduces shine and protects any prints or embroidery.
- Use the steam generously. Steam cuts ironing time significantly. Don’t be shy with it.
- Move in smooth, steady strokes. Short choppy movements create more wrinkles. Long gliding strokes give you a smoother result.
- Always unbutton the shirt completely. It makes it easier to move around the board and iron every part flat.
Ironing Without an Iron: Quick Alternatives
Sometimes you just don’t have time — or access to an iron. Here are a few alternatives that actually work.
A clothes steamer. Handheld steamers are brilliant for quick touch-ups. They don’t give you the crisp finish of a hot iron, but they remove most wrinkles fast without the risk of burns or scorch marks.
The shower trick. Hang the shirt in the bathroom while you take a hot shower. The steam from the shower relaxes the fabric. It won’t be perfectly smooth, but it’s much better than nothing.
A damp cloth and a flat surface. Lay the shirt on a flat surface, dampen a cloth, place it over the shirt, and press firmly with your hands. Works for small wrinkles.
A hair straightener. It sounds unusual, but it actually works for the collar and cuffs in a pinch. Clean the plates first and use low heat.
None of these replace a real iron for a formal shirt. But for casual wear or light wrinkles, they do the job.
Caring for Your Iron
A clean, well-maintained iron works better and lasts longer.
Empty the water tank after each use. Leaving water in the tank causes mineral buildup, which can clog the steam vents and cause the iron to spit brown water onto your clothes.
Clean the soleplate regularly. The flat metal surface can pick up residue from fabric or starch. Use a damp cloth to wipe it down when the iron is cool. For stubborn buildup, a paste of baking soda and water works well.
Descale periodically. If your iron produces less steam over time, mineral scale is likely the cause. Most irons have a self-cleaning function — run it every few months with fresh water. Or use a descaling solution designed for irons.
Store it safely. Always store your iron upright, not flat on its soleplate. Make sure it’s fully cool and unplugged before storing.
Final Thoughts
Ironing a shirt isn’t complicated once you break it down step by step. The collar first, then the cuffs, then the sleeves, then the back, and finally the front. Get your temperature right for the fabric. Use plenty of steam. Keep the iron moving.
That’s really it.
The first few times might feel a little awkward. But like any practical skill, it gets faster and more natural with practice. After a few sessions, you’ll have the whole thing done in under ten minutes — and your shirts will look sharp every single time.
A well-pressed shirt is one of the simplest things you can do to look polished and put-together. Now you know exactly how to do it.
Go press that shirt.