How to Highlight Hair at Home?
Highlighting your hair at home sounds scary. But honestly? It’s way easier than you think. You don’t need to spend hundreds of dollars at a salon. You can get gorgeous, salon-quality highlights right in your bathroom with the right steps and a little confidence.
In this guide, I’ll walk you through everything you need to know about DIY hair highlights. From picking the right products to applying them perfectly, you’ve got this.
Why More People Are Doing Hair Highlights at Home
Let’s be real. Salon appointments cost a lot. A highlight session can run you $75 to $200 or more, depending on where you live and how much work you need. When you add in tip and the time commitment, it gets expensive fast.
Home highlighting lets you save money and touch up your highlights whenever you want. You’re not waiting for your next appointment. You’re in control of your hair color schedule.
Plus, lots of home highlighting kits work great these days. The products have gotten so much better. Brands now make kits designed for people with no experience. The instructions are clear. The results look professional.
Types of Hair Highlights You Can Do at Home
Balayage Highlights
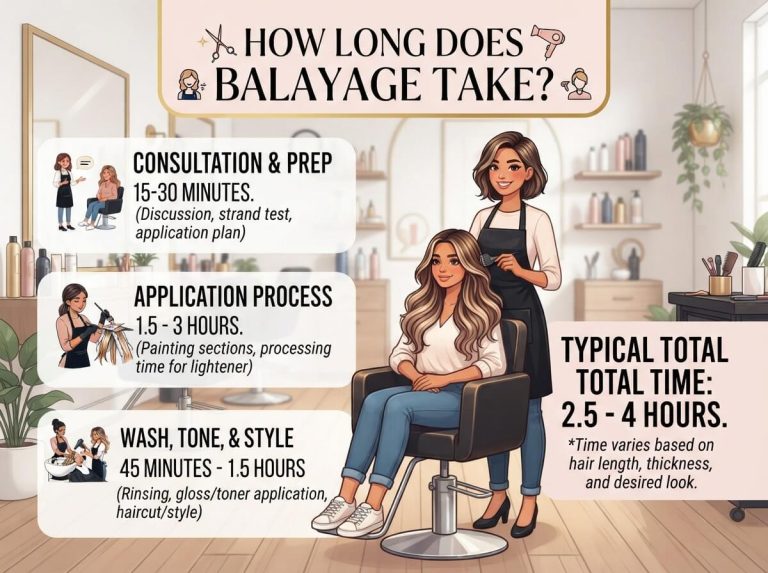
Balayage means you paint highlights onto your hair by hand. This gives you a natural, sun-kissed look. The color looks like the sun lightened it over time.
You can do balayage at home. It takes a steady hand and patience, but beginners can do it. The best part? Balayage doesn’t look bad if you’re not perfect. The whole point is a natural, slightly messy look.
Foil Highlights
Foil highlights use foil pieces to separate sections of hair. You apply the lightening product to the hair wrapped in foil. This creates more defined, structured highlights.
Foil highlights are tricky at home because you’re working with your own hair. You can’t see the back of your head well. But lots of people do manage it, especially for the front sections.
Babylights
Babylights are super thin, delicate highlights that blend into your hair. They look ultra-natural. Everyone thinks you were born with them.
Babylights take longer to apply because each highlight is so thin. They need a patient hand. If you’re good with detail work, you can create nice babylights at home.
Money Pieces
Money pieces are thick highlights that frame your face. They start at your roots and go down. These are called money pieces because they’re right where people see them.
Money pieces are one of the easiest highlights to do at home. You only need to worry about your face-framing sections. You don’t have to highlight your entire head.
What You Actually Need Before You Start
The Highlighting Kit
You need a kit designed for home use. These kits come with everything mixed in the right amounts. Popular brands include L’Oréal, Clairol, and Wella.
Buy a kit that matches your hair type and starting color. If your hair is very dark, get a kit designed for dark hair. If you have fine hair, get a kit for fine or delicate hair.
Always get more product than you think you need. It’s better to have extra than to run out halfway through.
A Brush or Applicator
Most kits come with an applicator brush. Some people prefer to use a dye brush they buy separately. A dye brush with fine bristles gives you more control.
Get a brush with a pointy end. The point helps you divide hair into sections.
Sectioning Clips
These clips hold hair out of the way while you work. You can use hair clips you already have, but real sectioning clips work better. They’re wider and grip better.
Get four to six clips so you can divide your head into sections.
Old Towels and Protective Gear
You’re going to get bleach on something. That’s just life. Use old towels you don’t care about.
Wear old clothes. Wear gloves (usually included in the kit). You might want to put on a plastic cape or just an old t-shirt.
A Mixing Bowl
Use a plastic or glass bowl to mix your highlighting product. Don’t use metal because the product can react with it.
Cotton Strips or Foil
If you’re doing foil highlights, you need aluminum foil or pre-cut foil strips. Pre-cut strips are easier. Regular kitchen foil works fine too.
If you’re doing balayage, you might not need foil. You paint the product straight onto the hair.
A Mirror and a Friend
A good mirror setup is key. You need to see the back of your head. A hand mirror plus your bathroom mirror works great.
If possible, have a friend help. An extra set of eyes and hands makes everything easier, especially for the back sections.
Step-by-Step Instructions for Highlighting Your Hair at Home
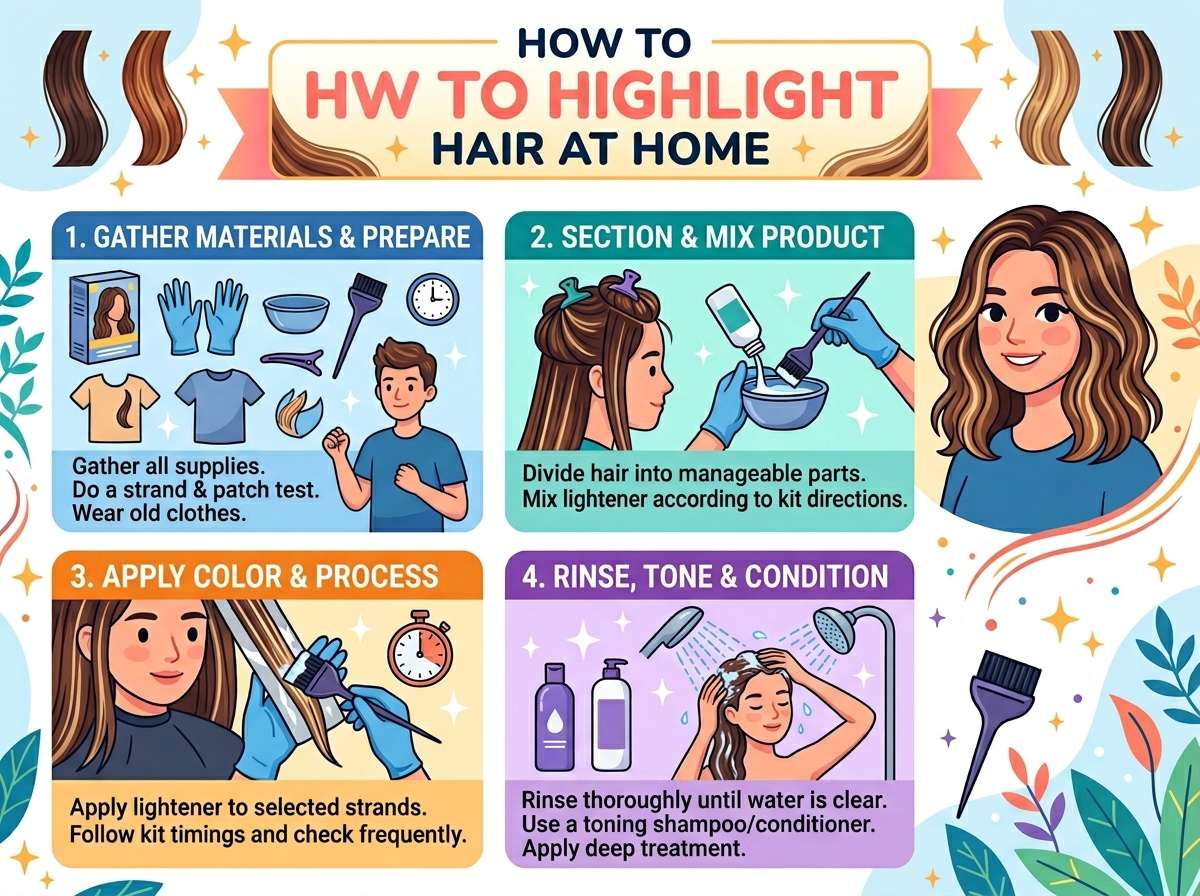
Step 1: Do a Patch Test First
Wait at least 24 hours after you buy your kit before you use it. Do a patch test on a small section of hair first. Mix a tiny bit of the product and apply it to a hidden section in the back.
This tells you how your hair will react. It also checks for allergic reactions. If your hair fries or you get itchy, don’t use the kit on your whole head.
Step 2: Prepare Your Hair
Don’t wash your hair the day you highlight. Your natural oils protect your scalp. Wash it the day before instead.
Brush your hair completely. Get all the tangles out. Tangles make it hard to apply the product evenly.
Step 3: Section Your Hair
Divide your hair into four to six sections. Start by making a part down the middle from your forehead to the back of your neck. Then make another part from ear to ear across the top of your head.
Clip each section. You want clean, organized sections so you don’t miss spots.
Step 4: Mix Your Product
Follow the kit instructions exactly. Mix the lightening formula with the developer in the right ratio. Use a plastic or glass bowl.
Mix until it looks smooth and creamy. Don’t make it too watery.
Step 5: Start Applying
Start with one section at the crown. The crown gets lighter faster because it’s closer to your heat. Leave the front face-framing sections for later.
Take a small section of hair. Use your brush to apply the product from the middle of the hair strand down to the ends. Don’t apply it right at the roots yet. Hair close to the scalp processes faster because of the heat from your head.
Step 6: Build Your Highlights
Work through each section. Make sure you’re getting even coverage. The product should be creamy and coat each hair.
If you’re doing foil highlights, place foil under each section as you apply the product. Fold the foil to hold the hair in place.
If you’re doing balayage, paint the product on by hand, sweeping it through sections for that painted, natural look.
Step 7: Apply to Your Roots
Once you’ve done the lengths, go back and apply product to your roots. Use less product on your roots because they process faster.
Be careful around your hairline. If you get product on your scalp, it might burn. You can apply a thin barrier cream along your hairline first to protect it.
Step 8: Work on Face-Framing Pieces
These highlight sections get special attention. Make sure they’re coated well because they’re visible.
These pieces are also closest to your warm scalp, so they’ll process fast. Don’t leave the product on them as long as the back sections.
Step 9: Check the Time and Watch Carefully
Set a timer for the time listed in the kit instructions. Most kits need 25 to 45 minutes. The exact time depends on your starting hair color and how light you want to go.
Check the color every five to ten minutes after the halfway point. To check, rinse a small hidden section and look at the color. If you like it, you’re done. If it needs more time, wash the test section and wait longer.
Don’t leave it on longer than the kit says. Over-processing makes your hair dry and damaged.
Step 10: Rinse Thoroughly
When you’re happy with the color, rinse with cool water. Keep rinsing until the water runs clear. This stops the lightening process.
Use a gentle, sulfate-free shampoo designed for color-treated hair. Shampoo twice and rinse well.
Step 11: Use a Toning Conditioner
Your new highlights might look brassy or yellow at first. A toning conditioner fixes this.
Apply the toning conditioner from mid-length to ends. Leave it on for the time listed on the bottle. This makes your highlights look cooler and more professional.
Step 12: Deep Condition and Dry
Apply a deep conditioning mask to your hair. Leave it on for at least ten minutes. Your hair just went through a lot and needs moisture.
Gently squeeze out water from your hair. Don’t rub. Blow-dry or air-dry your hair.
Common Mistakes People Make and How to Avoid Them
Mistake 1: Not Testing First
I said it before, but I’ll say it again. Always do a test first. Lots of people skip this and regret it. Your hair might not react how you expect.
Some hair takes lightener very fast. Some takes forever. You need to know which kind you have before you do your whole head.
Mistake 2: Leaving Product on Too Long
More time doesn’t always mean better results. Too much time damages your hair. It can turn your hair orange or even break it off.
Set a timer. Check often. When you’re happy with the color, rinse. Don’t guess about timing.
Mistake 3: Using the Wrong Product Strength
Developer strength matters. Lower volumes (10, 20) are gentler. Higher volumes (30, 40) lift color faster but damage more.
If you have delicate or previously colored hair, use lower volume. If your hair is thick and healthy, you can use higher volume.
The kit tells you which strength to buy. Match the kit to your hair type.
Mistake 4: Skipping the Deep Conditioning
A lot of people think highlighting is done when the color is set. But your hair needs serious moisture after. Without it, your highlights look dry and straw-like.
Invest in a good deep conditioning treatment. Use it right after highlighting and keep using it weekly.
Mistake 5: Not Using Enough Product
Stingy with the product? Your hair won’t highlight evenly. Some sections will be light, others barely changed.
Use enough product so your hair is dripping a little. Better too much than too little.
Mistake 6: Applying Product in the Wrong Order
Always start at the back and crown where hair processes slower. Work your way forward. Do the roots last. Front pieces closer to your face are hotter, so they need less time.
Getting the order right means even color all over.
Mistake 7: Not Protecting Your Scalp
Bleach can burn your scalp. Protect yourself with a barrier cream along your hairline and parting.
Wear gloves every second. Seriously. Don’t think you’ll just be careful. Wear gloves.
How Long Do Home-Highlighted Highlights Last?
Good news. Your highlights last way longer than you might think. Most highlights last six to eight weeks before you need a touch-up.
How long they last depends on a few things. Your hair growth matters. As new hair grows in, your roots show the original color. That’s why people touch up highlights.
Your hair type matters too. Porous, curly hair fades faster. Straight, healthy hair holds color longer.
How you care for your hair matters most. Washing with cool water, using sulfate-free shampoo, and deep conditioning regularly keeps highlights bright and healthy way longer.
Caring for Your Highlighted Hair After
Use a Purple or Blue Shampoo
Once a week, use a purple shampoo instead of your regular shampoo. This removes the yellow and brassy tones that show up on lighter hair.
Purple shampoo is specifically made for this. It’s not expensive. One bottle lasts forever.
Wash in Cool Water
Hot water opens your hair cuticle and lets color out. Cool water keeps color locked in.
Your scalp might not love cool water, but push through for a minute. Your hair will look better.
Limit Heat Styling
Every time you use heat on your hair, you’re damaging it more. Highlighted hair is already processed. Limit blow drying, flat iron, and curling iron use.
When you do use heat, always use a heat protectant spray first.
Get Regular Trims
Split ends make highlighted hair look bad. Get a trim every six to eight weeks. You don’t need much cut off. Just enough to remove the damaged ends.
Deep Condition Weekly
Don’t wait for when your hair feels dry. Deep condition every week as a maintenance step. This keeps your hair strong and prevents breakage.
When to Call a Professional
Some situations are better left to the pros. If your hair is very dark and you want very light highlights, a professional will give better results. If your hair is already damaged, a professional can help you decide the best approach.
If you mess up your first attempt, a professional can fix it. Fixing hair problems costs more than the original service, but sometimes it’s necessary.
If you have curly or textured hair, a professional might give smoother results. They understand how to work with different hair types.
The Bottom Line
Highlighting your hair at home is totally doable. You save money. You get to control your look. You can touch up whenever you want.
Start small. Maybe just do some face-framing highlights or money pieces. Get comfortable with the process. As you get better, you can tackle bigger projects.
Buy good products. Follow the instructions. Take your time. Ask for help if you need it.
Your hair will look amazing. You’ll wonder why you ever paid for salon highlights. Okay, you’ll still appreciate salons, but now you know you have options.
Go rock your new highlights. You’ve got this.
FAQ About Home Hair Highlighting
Can I highlight my hair if it’s previously been colored?
Yes, but be careful. Hair that’s already been colored is more delicate. Use a lower volume developer. Do a test first. It’s extra important to deep condition after.
How often can I highlight my hair?
Highlight touch-ups are usually needed every six to eight weeks. But you shouldn’t be lightening the same hair more than that frequency. Space out your highlights to keep your hair healthy.
What if my highlights turn out too yellow or brassy?
Use a toning shampoo or conditioner. Purple shampoo for blonde highlights. Blue shampoo for darker highlights. You can also use a toning treatment from the drugstore.
Can I use regular dye instead of a highlighting kit?
No. Regular dye is permanent color. You need lightening product to create highlights. Lightening is different from coloring.
Is it bad to highlight your hair multiple times?
Repeated highlighting can damage your hair if you don’t take care of it. Deep condition regularly. Don’t heat style. Give your hair breaks between highlighting sessions. With good care, you can highlight regularly without severe damage.
How do I know what shade of highlights to get?
Look at your skin tone. Cool skin tones look better with ash-blonde or cooler highlights. Warm skin tones look better with golden or honey highlights. Your natural hair color matters too. Very dark hair goes lighter faster than dark hair.
Can I highlight my hair myself in the front but ask a friend to do the back?
Yes. Having a friend help makes it way easier. They can see the back better than you can. You can take turns doing each other’s hair.
What’s the difference between highlights and lowlights?
Highlights are lighter than your natural color. Lowlights are darker than your natural color. You can do both for dimension.
Do I need special shampoo for highlighted hair?
You should use sulfate-free shampoo and a color-safe conditioner. These are gentler and don’t strip your color. They cost a bit more but last longer.
Can I highlight my hair if I have an oily scalp?
Yes. Just don’t wash your hair for a few days before highlighting. The natural oil protects your scalp during the process.
Final Thoughts on Doing Your Own Hair Highlights
Your hair is a big part of how you feel about yourself. Changing your look is exciting. Doing it yourself makes it even more empowering.
Yes, mistakes can happen. But most mistakes are fixable. And honestly, most home highlighting attempts turn out really well. You’re probably more skilled than you think.
Start with the process. Read through these steps a few times. Get your supplies. Then commit. You’re going to have gorgeous highlights, and you’re going to save serious money doing it.
Your future self will thank you. That person looking in the mirror with beautiful new highlights? That’s you. And you did that yourself.
Now go highlight your hair and love how you look.
Mary is a fashion enthusiast and lifestyle writer who loves discovering stylish clothing, accessories, and everyday fashion essentials. She enjoys researching the latest trends, reviewing popular products, and sharing practical style tips to help readers dress with confidence. Through FashionSolve.com, Mary provides honest recommendations, fashion guides, and inspiration for building a wardrobe that is both stylish and affordable.