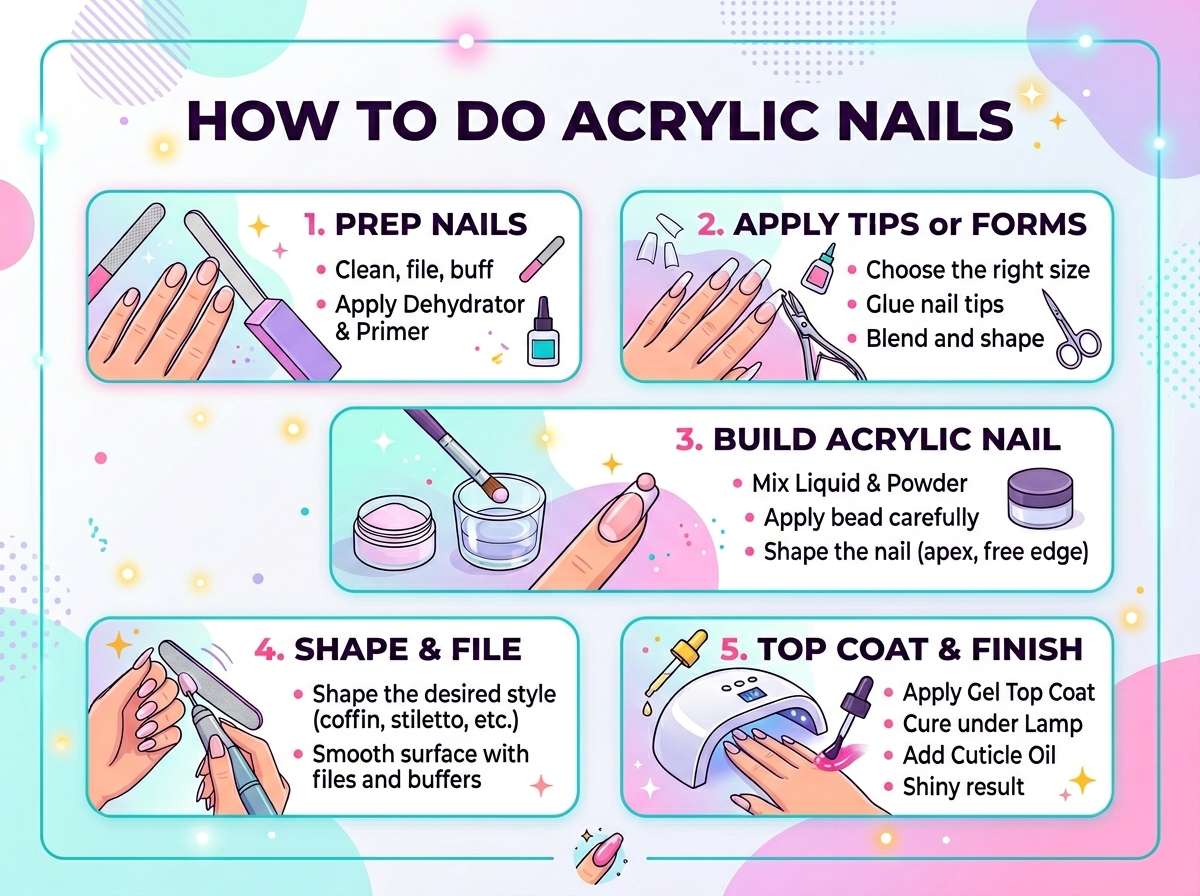
How to Do Acrylic Nails?
Getting acrylic nails has become one of the most popular beauty trends. Many people love them because they last longer than regular polish and look stunning. If you’ve ever thought about doing acrylic nails at home, you’re in the right place. This guide will walk you through everything you need to know.
What Are Acrylic Nails?
Acrylic nails are fake nail extensions made from a mix of liquid and powder. When you combine these two things together, they create a hard, durable material. This material bonds to your natural nails and gives you longer, stronger nails that you can style however you want.
The beauty of acrylic manicures is that they don’t chip as easily as regular polish. They can last two to three weeks without looking bad. Plus, they hold their shine and color really well.
Acrylic nail application is actually a chemical process. The liquid and powder react with each other and harden quickly. This is why you need the right supplies and proper technique to get good results.
Why Choose Acrylic Nails?
There are many reasons why people pick acrylic nails over other options. Here are the main benefits:
They Last Long Acrylic extensions stay on your fingers for weeks. You won’t have to repaint your nails every few days like you would with regular polish.
They’re Strong Once they dry, acrylic nails are super hard and tough. This means they won’t break or crack easily, even if you use your hands a lot.
They Look Professional Acrylic nail designs look polished and neat. Your nails will look like you just came from a salon every single day.
You Can Customize Them Want long nails? Short nails? Pink and white ombre? Bright colors? Designs? You can do almost anything with acrylic nails. The options are endless.
They Protect Your Natural Nails If your natural nails are weak or you bite them, acrylic nails protect them while they grow stronger underneath.
Tools and Supplies You’ll Need
Before you start doing acrylic nails, gather all your supplies. Having everything ready makes the process much easier and faster.
Essential Supplies
Acrylic powder comes in many colors. You can get clear, white, pink, or any color you want. Liquid monomer is the clear solution that mixes with the powder. These two things are the base of your acrylic nails.
A nail file is crucial. You’ll use this to shape your nails and smooth out rough edges. Get a good quality file because cheap ones can damage your nails.
Nail tips are the plastic bases you glue onto your natural nails. They come in different sizes so you can find ones that fit each finger perfectly. You’ll also need nail glue to stick these tips onto your nails.
A nail buffer helps smooth and prep your natural nails before you apply the acrylic. This step is really important for making sure the acrylics stick well.
Cuticle tools help you push back your cuticles. Clean cuticles give you a nice canvas to work with.
A nail brush is used to apply the acrylic mixture onto your nails. A dappen dish holds your liquid monomer so you can dip your brush in it.
Extra Tools That Help
A lamp or UV light helps cure some types of acrylic nails faster. Not all acrylics need light to cure, but some do.
Nail dehydrator removes moisture from your nails before you apply acrylic. This helps the acrylic stick better.
Isopropyl alcohol cleans your nails and removes oil. Clean nails are essential for good adhesion.
A drill can help you remove old acrylic nails, though this is optional for beginners.
Preparing Your Natural Nails
Good prep work makes all the difference. Your natural nails are the foundation for your acrylic extensions. If you skip this step, your acrylics won’t last as long.
Step 1: Clean Your Hands Wash your hands with soap and water. Dry them completely. Make sure there’s no dirt, oil, or lotion on your nails.
Step 2: Push Back Your Cuticles Use a cuticle pusher to gently push your cuticles back. Don’t be rough. You’re not trying to remove them completely, just push them out of the way. This gives you more nail surface to work with.
Step 3: File Your Natural Nails Short File your natural nails really short. They should be as short as possible. This gives the acrylic tips more room to sit properly on your nail plate.
Step 4: Buff Your Nails Use a buffer to roughen up the surface of your nails. This scratching creates friction that helps the acrylic stick better. Buff gently but thoroughly across the entire nail surface.
Step 5: Remove the Shine Make sure your nails look matte, not shiny. If they’re still shiny, buff them more.
Step 6: Clean Again Wipe your nails with isopropyl alcohol or a nail dehydrator. This removes any dust from buffing and any oils on your skin.
Let your nails dry completely before you move on to the next step.
Applying Nail Tips
Nail tips are the foundation of your acrylic nails. Getting them on correctly is really important.
Choose the Right Size Look at each of your nails and find a tip that fits. The tip should cover your entire nail width. It shouldn’t be too big or too small. Try different sizes until you find the perfect fit for each finger.
Apply the Glue Put a small drop of nail glue on the tip. Don’t use too much. A little bit goes a long way. You can also put a tiny bit on your natural nail if you want.
Press and Hold Press the tip onto your nail at a 45-degree angle first. Then slowly lower it flat onto your nail, pressing down firmly. Hold it there for about 10 to 15 seconds. Make sure there are no air bubbles between the tip and your nail.
Let It Dry Wait a minute or two for the glue to dry before you touch anything.
Trim and Shape Use a nail file to trim the tips to your desired length. File them into the shape you want. You can make them square, round, or oval. Round or square shapes work best for beginners.
Mixing and Applying Acrylic
This is the main part of the process. Once you get good at this, you’ll feel like a pro.
Get Your Supplies Ready Pour your liquid monomer into a dappen dish. Have your acrylic powder nearby. Make sure your brush is clean and dry.
Dip Your Brush Wet your brush in the liquid monomer. Then dip it into the acrylic powder. You want a good amount of powder on your brush. This mixture should look like wet sand. Not too wet, not too dry.
Apply to the Nail Place the acrylic bead on your nail tip, starting at the base. Press it down gently and drag it toward the free edge of your nail. The acrylic will spread out as you work with it.
Smooth It Out Use your brush to smooth the acrylic across your nail. You want it to be even and not lumpy. The acrylic should cover the seam between the tip and your natural nail.
Build Up Layers You might need to apply more than one layer of acrylic to get good coverage. Let each layer cure before adding another one. Most acrylics cure on their own and don’t need a light.
Let It Harden Wait for the acrylic to fully cure. This usually takes a few minutes per layer. Don’t touch your nails while they’re drying.
Shaping and Finishing Your Acrylic Nails
Once the acrylic is dry, you’re not done yet. You need to shape and polish it.
File Into Shape Use a nail file to shape your acrylic nails. This is where you really create your look. File the edges and the top of the nail to your desired shape. Be patient and take your time.
Buff and Smooth Use a buffer to smooth out any rough spots. This also helps blend the seams between the acrylic and the nail tip.
Shape the Apex The apex is the highest point on your nail. A good apex makes your nails look stronger and helps them last longer. File your nails so they’re slightly higher in the middle and lower at the edges.
Create the Free Edge The free edge is the part of the nail that extends past your finger. Make sure it’s smooth and even.
Polish or Paint Now you can apply nail polish to color your nails, or leave them natural. If you use polish, make sure to apply a base coat first. Polish sticks better when you prepare the surface. You can do basic designs with a thin brush or toothpick, or keep it simple with one color.
Common Mistakes to Avoid
Learning from other people’s mistakes helps you get better faster.
Using Too Much Product More acrylic doesn’t make better nails. Too much product can make your nails look thick and bumpy. Use just enough to cover your nail smoothly.
Not Preparing Your Nails If you skip the prepping step, your acrylics will pop off within a few days. Don’t rush this part.
Applying Acrylic Too Thick Thick acrylic nails are heavy and uncomfortable. They also break more easily. Aim for a medium thickness.
Not Letting It Cure Fully Acrylic needs time to harden completely. Don’t trim or file your nails right after applying the acrylic. Wait until it’s completely hard.
Filing Too Aggressively Gentle filing gives better results than aggressive filing. Use light pressure and let the file do the work.
Wrong Brush Technique Your brush technique really matters. Practice your dipping and placing motion until it feels smooth and natural.
Ignoring the Seam The seam between the tip and your natural nail needs good coverage. If you miss it, water can get underneath and your nails will pop off.
Maintenance and Care
Taking care of your acrylic nails makes them last longer and keeps them looking great.
Get Regular Fills Every two to three weeks, your natural nails grow out and you’ll see a gap at the base. Visit a salon or do a fill at home. A fill means applying fresh acrylic to cover the new growth.
Keep Them Clean Wash your hands regularly and clean under your nails. Dirt buildup can make your nails look messy.
Wear Gloves When you do dishes or clean the house, wear gloves. Water and harsh chemicals can damage acrylic nails over time.
Avoid Using Your Nails as Tools Don’t use your nails to open things or pick at stuff. This causes breakage. Use your fingertips or actual tools instead.
Moisturize Your Cuticles Apply cuticle oil or hand lotion regularly. Healthy cuticles help your nails stay strong.
Don’t Soak Your Nails in Water Long soaks in water can cause lifting. Dry your hands quickly after washing or bathing.
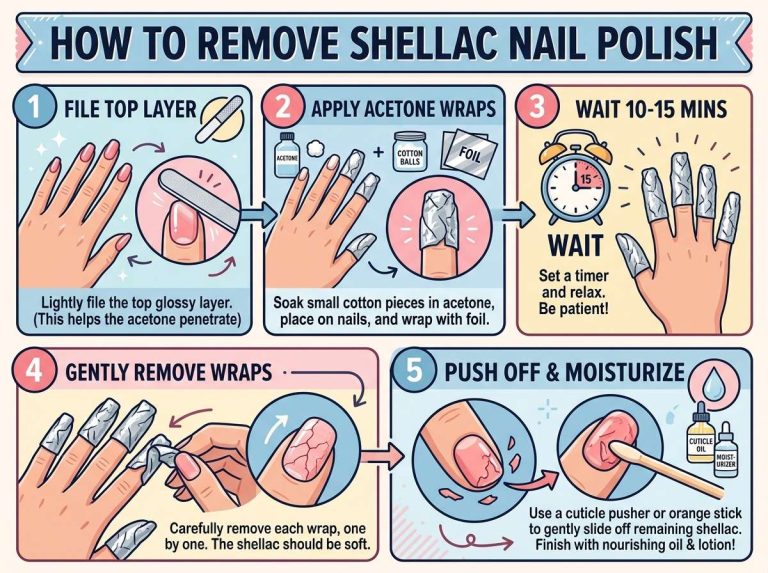
Be Gentle During Removal When it’s time to remove your acrylics, soak them in acetone for about 15 to 20 minutes. Then gently peel them off. Don’t force them or you’ll damage your natural nails. Soak longer if they’re not coming off easily.
Troubleshooting Common Problems
Even experienced people run into issues sometimes. Here’s how to fix them.
Acrylics Keep Popping Off This usually means you didn’t prep your nails well enough. Make sure you buff and clean your nails before application. Also check that you’re using enough product to seal the seam between the tip and natural nail.
Acrylics Look Bumpy Bumpy acrylics mean your application wasn’t smooth. Practice your brush technique and take your time applying the product. File and buff more carefully during the finishing stage.
Nails Feel Weak or Brittle Your natural nails might be damaged from the acrylic. Give them a break between applications. When you do wear acrylics again, use less product. Also keep your natural nails short and moisturized.
White Spots Under the Acrylic These are usually air bubbles. They happen when you apply the acrylic too fast or don’t press it down enough. Slow down during application and make sure there’s good contact between the acrylic and your nail.
Yellowing or Discoloration Dark polish colors can sometimes stain acrylic nails. Use a base coat before applying dark polish. Also, the quality of your acrylic powder might affect yellowing. Try using a clearer, whiter powder.
Acrylic Won’t Cure Make sure your liquid to powder ratio is correct. If it’s too wet, it won’t harden properly. Add more powder if needed. Also make sure your acrylic supplies are fresh. Old products don’t work well.
Different Acrylic Nail Styles
Once you get comfortable with basic acrylics, you can try different styles.
Short and Square This is the easiest style for beginners. Short nails are harder to break and easier to maintain. Square nails look neat and modern.
Medium and Rounded Medium length nails feel more natural but still look polished. Rounded edges are elegant and flattering.
Long and Stiletto Stiletto nails are long and pointed. They look glamorous but are more fragile and harder to manage. Skip these until you get really good at application.
Ombre and Gradient An ombre nail has a color gradient from one shade to another. You can create this with powder or polish.
Marble and Designs Once you’re comfortable, try adding designs. Marble looks swirly and cool. Stripes, dots, or florals are other fun options.
Glitter and Sparkle Add sparkle with glitter powder or polish. This makes your nails extra fancy.
Cost of Doing Acrylic Nails at Home
One big reason people want to do acrylic nails at home is to save money.
Initial Investment Your startup costs will be around 50 to 100 dollars. You need to buy the basic supplies like acrylic powder, liquid monomer, brushes, nail tips, files, and tools. These supplies last a long time.
Cost Per Manicure Once you have your supplies, each manicure costs only a few dollars. The acrylic powder and tips are inexpensive. This beats going to a salon where a full set costs 30 to 60 dollars.
Savings Over Time If you get acrylic nails every two weeks, you’ll save hundreds of dollars a year by doing them at home. Even with fills, your costs stay low.
Safety and Health Considerations
Taking care of your health while working with acrylics is important.
Work in a Ventilated Area Acrylic fumes can be strong. Always work somewhere with good air flow. Open a window or work near a fan.
Wear a Mask A dust mask or respirator protects your lungs from acrylic fumes and powder particles.
Wash Your Hands Often Wash your hands after working with acrylic products. Don’t let them sit on your skin for long.
Check for Allergies Some people are allergic to acrylic components. If you notice redness, itching, or swelling, stop using acrylics and talk to a doctor.
Keep Products Away from Eyes Acrylic powder and liquid can hurt your eyes. Be careful and don’t touch your face while working.
Store Supplies Safely Keep your acrylic supplies in a cool, dry place. Keep them away from kids and pets.
Practice Tips for Success
Getting good at acrylic nails takes practice. Here are some tips to improve faster.
Start with Practice Nails Use fake practice nails to learn the technique before doing your own nails. These are cheap and let you make mistakes without worrying.
Go Slow Speed comes with practice. Don’t rush when you’re learning. Take your time and focus on doing things right.
Watch Videos YouTube has tons of acrylic nail tutorials. Watch experienced nail techs and copy their techniques.
Keep Notes Write down what works and what doesn’t. Keep track of product names, quantities, and techniques that give you good results.
Be Patient with Yourself Your first few tries might not look perfect. That’s totally normal. Everyone starts as a beginner. Keep practicing and you’ll get better.
Perfect Your Brush Technique Your brush is your most important tool. Practice the motion of dipping, picking up product, and placing it on your nail until it feels smooth.
Focus on Prep Work Good prep work is more important than perfect application. Spend extra time preparing your nails and you’ll have better success.
When to Call a Professional
Sometimes it’s worth going to a salon instead.
If You’re Not Comfortable Yet There’s no shame in letting a pro do your nails while you’re learning. Watching them work is a great way to learn.
For Special Occasions If you want something really fancy or complicated, a professional can do amazing designs that take years to master.
If You Have Nail Issues If your nails are damaged or you have a skin condition, see a professional who can advise you.
For Expensive Materials Some high-end acrylic systems cost way more than basic ones. A professional knows which ones are worth it.
Conclusion
Learning how to do acrylic nails at home is totally doable. It takes some practice and patience, but you can definitely master it. Start with the basics. Focus on good prep work and basic application. Once you feel comfortable, you can experiment with colors and designs.
The key to success is practice. Your first few sets might not be perfect, but that’s okay. Each time you do them, you’ll get better. Before long, you’ll have gorgeous acrylic nails that last for weeks.
Remember to take care of your natural nails underneath. Proper maintenance and careful removal will keep your nails healthy for the long term. You can have beautiful acrylic nails and healthy natural nails at the same time with the right technique.
Have fun with your new skill. Acrylic nails are a great way to express yourself and feel confident. Enjoy the process of learning and creating beautiful nails that you’ll love to show off.
Mary is a fashion enthusiast and lifestyle writer who loves discovering stylish clothing, accessories, and everyday fashion essentials. She enjoys researching the latest trends, reviewing popular products, and sharing practical style tips to help readers dress with confidence. Through FashionSolve.com, Mary provides honest recommendations, fashion guides, and inspiration for building a wardrobe that is both stylish and affordable.