How to Clean Makeup Sponges?
Your makeup sponges work hard for you every single day. They help you blend foundation, set powder, and create that flawless finish you love. But do you know what’s living on them? Bacteria, leftover makeup, dead skin cells, and dirt accumulate on your sponges faster than you might think. The good news? Cleaning them is easy, and you probably have everything you need at home right now.
If you’ve never cleaned your makeup sponges before, don’t feel bad. Most people don’t realize how important it is until they start getting skin breakouts or their sponges stop working well. Once you learn the simple steps, it becomes part of your routine. In this guide, we’ll walk you through everything you need to know about maintaining your beauty sponges. Let’s get started.
Why You Need to Clean Your Makeup Sponges Regularly
Before we jump into the how, let’s talk about the why. Your skin deserves clean tools, and your sponges deserve proper care.
Every time you use your makeup sponge, you’re picking up bacteria from your face and hands. Oil, sweat, and dead skin cells stick to the sponge. Leftover foundation settles into the tiny holes in the sponge material. Powder clumps up. If you keep using a dirty sponge without cleaning it, you’re basically spreading all that stuff back onto your face.
This can lead to breakouts, irritation, and bumpy skin texture. Even if you don’t break out, a dirty sponge just doesn’t work as well. It won’t pick up product smoothly. Your makeup won’t blend right. The color might look off.
Clean sponges also last longer. When you keep grime and old makeup buildup on them, the material breaks down faster. Fibers start falling apart. Holes get clogged. But when you clean your sponges regularly, they stay soft and bouncy for months longer.
Think of it this way: you wouldn’t use the same dirty towel every day without washing it, right? Your makeup sponge should get the same treatment. It’s touching your face constantly. It needs to be clean.
How Often Should You Clean Your Makeup Sponges?
Let’s talk frequency first, because this is the question everyone asks.
If you use your sponge every single day, you should clean it at least two to three times per week. Some makeup artists recommend even more often. If you use it less frequently, once a week is fine.
If you notice your sponge looking really dirty, dark, or grimy, clean it right away. Don’t wait for your scheduled cleaning day. Trust your gut. Your sponge will tell you when it needs help.
The thing is, regular cleaning is way better than waiting until your sponge looks disgusting. A quick cleaning two or three times a week keeps things fresh and prevents buildup from getting out of hand.
Method 1: The Soap and Water Approach
This is the easiest method, and it works great for regular maintenance cleaning.
What you’ll need:
- Your dirty makeup sponge
- Warm water
- Regular hand soap or body wash
- A clean cup or bowl
- A clean towel
Steps to follow:
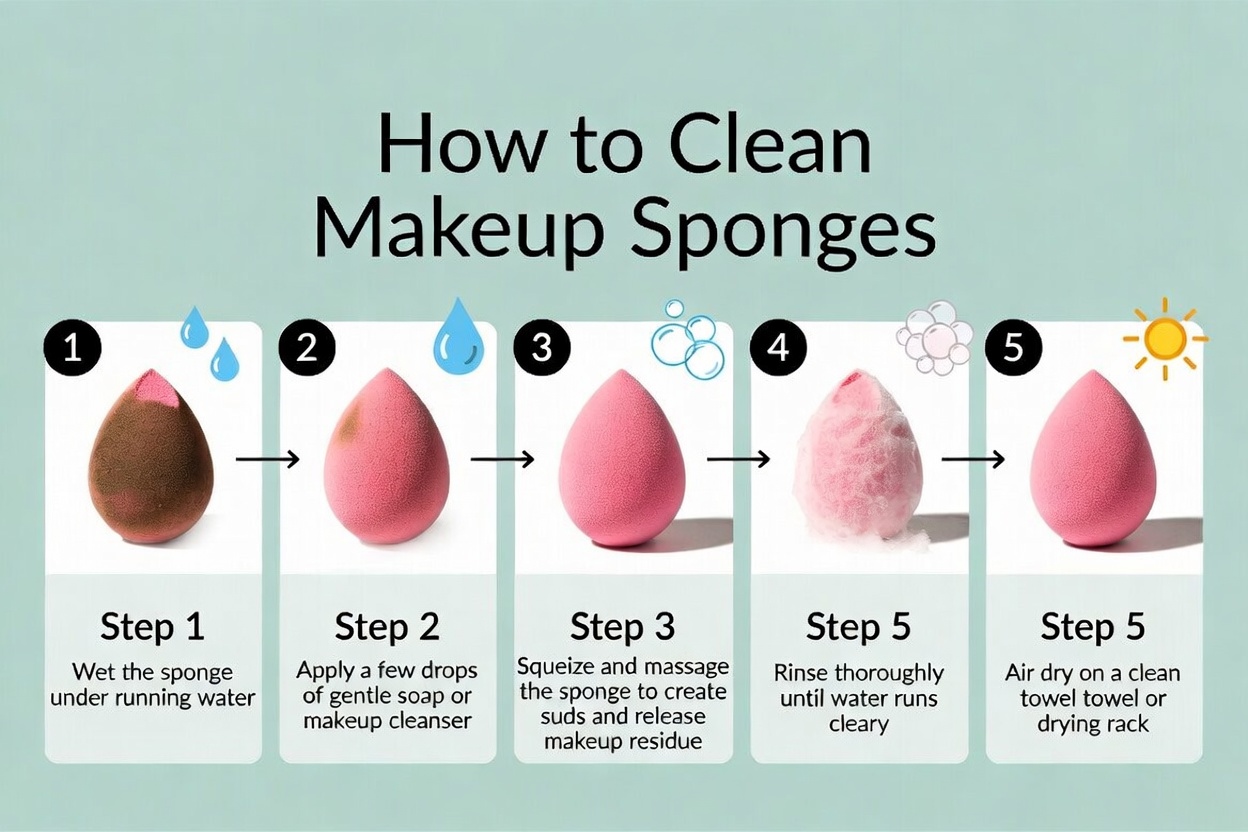
Start by running your sponge under warm water. Make it nice and damp. The water should feel comfortably warm, not hot. Hot water can damage the sponge material over time.
Grab your soap. You can use any gentle soap you have at home. Hand soap works great. Body wash works too. Even your regular facial cleanser can work if that’s what you have. Just squeeze a little into the palm of your hand or directly onto the sponge.
Now rub the soapy sponge together between your hands like you’re lathering up for a wash. Get all those suds going. Work the soap into every part of the sponge. Really squeeze it. This helps the soap get into all the tiny holes and pores where makeup hides.
Keep rubbing and squeezing for about thirty seconds to a minute. You’ll see the water getting colored as the makeup comes out. That’s exactly what you want to see. It means it’s working.
Rinse the sponge under running water. Keep rinsing until the water coming out is clear. No more color. No more bubbles. This might take a few rinses. Don’t skip this step because leftover soap will irritate your skin.
Squeeze out the excess water gently. Don’t wring it hard like you’re wringing out a towel. That can damage the sponge material. Just press it gently to get the water out.
Lay it flat on a clean towel to dry. You can also stand it upright on the towel. Make sure air can get to all sides of it. Let it dry completely before using it again. This usually takes a few hours.
That’s it! Super simple, right?
Method 2: The Cleanser Powder Trick
If your sponges are really dirty or you want a deep clean, try this method.
What you’ll need:
- Your makeup sponge
- A cup of warm water
- A cleanser powder or solid soap (like a cleansing bar)
- Optional: a small cup or container
Steps to follow:
Fill a cup or bowl with warm water. Don’t make it too hot. You want it to feel nice and warm, like a relaxing bath temperature.
Take your cleanser powder or solid soap. If you use a cleansing bar, you can rub the sponge directly on it a few times. If you use a powder, mix a little with the warm water to make a pasty liquid.
Place your sponge into the water or rub it on the soap. Squeeze it and work the cleanser through all the material. You want the whole thing to get soapy and foamy.
Keep squeezing for about a minute or two. This gives the cleanser time to break down all that stubborn makeup buildup.
Rinse it thoroughly under running water until the water runs clear. Again, no soap residue left behind.
Squeeze gently to remove water, then lay it flat to dry completely.
This method is great for a weekly deep clean.
Method 3: Using Makeup Brush Cleaner
If you already have makeup brush cleaner at home, you can use it for your sponges too.
What you’ll need:
- Your makeup sponge
- Makeup brush cleaner spray or liquid
- Warm water
- A bowl or cup
Steps to follow:
Fill a small bowl with warm water.
Spray or apply the brush cleaner directly onto your sponge. Follow the instructions on your specific product. Some require you to let it sit for a minute.
Work the cleaner through the sponge by squeezing it in your hands. You’ll see the makeup coming off right away.
Rinse thoroughly under warm water until all the product is gone and the sponge feels clean.
Pat it dry gently and lay it flat to dry completely.
This method is super fast and works really well if you buy a good quality brush cleaner.
Method 4: The Oil Cleansing Method
This method is perfect if you have stubborn makeup stuck on your sponge.
What you’ll need:
- Your makeup sponge
- A gentle oil (coconut oil, jojoba oil, or even olive oil)
- Warm water
- Soap or cleanser
- A bowl
Steps to follow:
Put a small amount of oil directly on your sponge. We’re talking just a quarter-sized amount. You don’t need much.
Squeeze the oil into the sponge. Work it through all the material. The oil will help break down all that stubborn makeup that won’t come out with water alone.
Let it sit for a minute or two. This gives the oil time to do its work.
Now add some soap to the oily sponge and work it together with water. The soap will help wash away the oil and the makeup at the same time.
Rinse very well under warm water. You might need extra rinses to get all the oil out. Make sure the sponge doesn’t feel slippery when you’re done.
Squeeze out water gently and lay flat to dry.
This method is a lifesaver for those really tough cleaning jobs.
Method 5: Soaking for Deep Cleaning
Sometimes your sponges need to soak and really relax for a deep clean.
What you’ll need:
- Your makeup sponges
- A cup or small bowl
- Warm water
- Soap, cleanser powder, or brush cleaner
- Optional: white vinegar
Steps to follow:
Fill a cup with warm water. Make it warm enough to feel nice on your hands but not so hot it’s uncomfortable.
Add a small amount of soap, cleanser powder, or brush cleaner to the water. Mix it around so it’s evenly distributed. If you want to add a little white vinegar for extra cleaning power, add just a splash.
Place your sponges in the water. Push them down so they’re fully submerged.
Let them soak for fifteen to thirty minutes. You can let them sit longer if they’re really dirty. During this time, you can relax and do something else.
After soaking, take each sponge out and rinse it under warm water. You might notice the makeup is much easier to get off now.
If needed, gently rub the sponge in your hands to help the remaining makeup release.
Rinse until the water is completely clear.
Squeeze gently and lay flat to dry.
This is the ultimate deep clean method. Your sponges will feel brand new.
Method 6: Using a Sponge Cleaning Tool
You can buy special cleaning devices made just for makeup sponges and brushes.
What you’ll need:
- Your makeup sponge
- A silicone cleaning mat, brush cleaner pad, or similar tool
- Warm water
- Soap or cleanser
Steps to follow:
Fill a cup with warm water and add a little soap or cleanser.
Hold your sponge and rub it against the bumpy surface of the cleaning tool. The bumps help scrub away makeup and dirt.
Keep rubbing it back and forth, pushing your sponge down gently so the bumps can really work on it.
After rubbing it for about a minute, rinse the sponge under warm water.
If it still needs work, repeat the rubbing process.
Rinse again and lay flat to dry.
These tools are optional but really handy if you clean a lot of sponges regularly.
Drying Your Sponges the Right Way
How you dry your sponges matters more than you might think.
Never squeeze or wring your sponge like you’re squeezing a lemon. This damages the material and can cause pieces to tear off. Always squeeze gently.
Don’t hang your sponge from a string or clip while it’s wet. This can stretch out the material and cause it to lose its shape.
The best way is to lay it flat on a clean, dry towel. If you want, you can stand it on one of its edges so air gets to more of it. Just make sure it’s sitting on something clean and dry.
Let it air dry completely. This usually takes a few hours to overnight. Don’t use it until it’s totally dry because a damp sponge is a playground for bacteria.
You can also place your sponge in a warm room or near a fan to speed up drying. Just don’t put it near direct heat like a radiator or in the sun. That can damage the material.
If your sponge starts smelling bad, it might not be drying properly. Make sure it’s in a place with good air circulation.
Signs Your Sponge Needs to Be Replaced
Eventually, every sponge reaches the end of its life. Here’s what to look for.
If your sponge is falling apart, losing pieces, or has holes in it, it’s time to replace it. It won’t work well anymore, and bits of it might come off on your face.
If it’s developed a permanent smell that won’t go away even after cleaning, that’s a sign bacteria have moved in deep. A new sponge is your best bet.
If it’s lost its bounce and feels hard and stiff no matter how clean you keep it, the material has broken down. Time for a replacement.
If you’ve had the same sponge for six months to a year of regular use, it’s probably ready to retire anyway. Most makeup sponges are meant to last about three to six months with regular use.
Don’t keep using a sponge that’s clearly done. Your skin will thank you for upgrading.
Pro Tips for Makeup Sponge Maintenance
Here are some extra tricks that makeup artists and beauty experts swear by.
Keep multiple sponges in rotation. This way, while one is drying, you have another clean one ready to use. It takes pressure off the drying process and means you always have a sponge available.
Clean your sponges right after you use them if you can. Don’t let makeup dry on them overnight. Fresh cleanup is always easier than dried-on makeup.
Store your clean, dry sponges in a clean container. A small cup, a drawer, or even a makeup bag works. Just make sure the container is clean so you don’t get dust on them.
Keep your hands clean when you use your sponge. Your hands pass bacteria to the sponge. Washing your hands before doing makeup helps keep your sponge cleaner longer.
Don’t share your sponges with other people. This spreads bacteria and germs. Every person should have their own sponges.
If you travel, bring a sponge cleaning pouch or a travel-sized bottle of cleaner. You can do quick cleanings on the go to keep your sponges fresher while traveling.
Watch how you apply makeup. The gentler you are with your sponge, the longer it lasts. Don’t rub it aggressively or bounce it on your face like you’re trying to beat it into submission.
Common Mistakes People Make
Let’s talk about what not to do, because these mistakes are super common.
Don’t use hot water. It breaks down the material and can shrink your sponge. Warm is perfect.
Don’t put your sponge in the dishwasher or washing machine. The heat and harsh cycles will destroy it.
Don’t use harsh chemicals or bleach to clean your sponge. These can irritate your skin and damage the material.
Don’t let your sponge dry in direct sunlight for hours. It can fade and get damaged.
Don’t store wet sponges. Always make sure they’re completely dry before putting them away. A wet sponge stored in a dark container is a bacteria paradise.
Don’t ignore mold or mildew. If you see any dark spots or smell mold, throw the sponge away. Don’t try to clean it.
Don’t use the same sponge for multiple products without cleaning it between. If you use one sponge for foundation, then powder, then highlighter, you’re mixing all those products together. Rinse it between each step.
Different Types of Sponges and Their Cleaning Needs
Different sponge materials might need slightly different approaches.
Beauty blender style sponges are dense and durable. They handle all cleaning methods well. Use any method that works for you.
Silicone sponges are great because they don’t absorb liquid as much. They’re easier to clean overall. Just make sure you really get into any textured areas.
Natural sea sponges are delicate. Use gentle methods like soap and water. Avoid rough scrubbing or harsh chemicals.
Wedge sponges are good for powder application. They have a flat side that’s easy to clean. Treat them like any other sponge.
Stipple sponges with bumpy surfaces need extra care to clean the bumps. Rub them well to get makeup out of all those little texture spots.
No matter what type you have, the basic principles are the same. Clean regularly, use warm water, be gentle, and dry completely.
Natural and Budget-Friendly Cleaning Solutions
You don’t need expensive products to clean your sponges well.
Baking soda is amazing. Mix a teaspoon with water to make a paste, then work it into your sponge. It’s a gentle abrasive that helps lift makeup without being harsh.
White vinegar is a natural antibacterial. Add a splash to your cleaning water for extra disinfecting power. Don’t use too much or your sponge might smell like vinegar for a bit.
Coconut oil breaks down makeup beautifully. Use the oil cleansing method described earlier for stubborn makeup.
Regular dish soap works just fine. You don’t need special brush cleaner. Your sponge will clean up just as well.
Plain water and mechanical cleaning (rubbing and squeezing) can handle light daily maintenance without any extra products.
These budget options are just as effective as expensive products. Save your money.
Keeping Your Skin Happy and Healthy
The real reason to clean your sponges is to keep your skin happy. Clean sponges mean less bacteria getting pushed back onto your face.
If you’ve been breaking out and you haven’t been cleaning your sponges regularly, try starting a routine. You might be surprised at how much better your skin looks after just one week of clean sponges.
Clean application tools are non-negotiable if you have sensitive skin, acne-prone skin, or any skin condition. Your skin barrier is already working hard. Don’t make it harder by exposing it to dirty tools.
People with rosacea, eczema, or other inflammatory conditions should be extra careful about sponge cleanliness. Bacteria can trigger flare-ups.
Even if your skin is super clear, getting in the habit of cleaning your sponges is smart prevention. Why wait for a problem when you can stop it before it starts?
Making Sponge Cleaning Part of Your Routine
The best way to stay on top of this is to make it automatic.
Pick a specific day or days each week for sponge cleaning. Maybe it’s every Sunday and Wednesday. Maybe it’s every few days. Just pick a schedule and stick with it.
Keep all your cleaning supplies in one spot. A small basket or container under your sink with soap, a small bowl, and a towel. When it’s cleaning day, you know exactly where everything is.
Set a phone reminder if you’re forgetful. A notification that says “Clean your sponges today” is a simple way to stay consistent.
Treat sponge cleaning like you treat brushing your teeth. It’s just part of your regular beauty routine now.
The more you do it, the faster it becomes. What seems like a big task now will feel like a thirty-second thing after you’ve done it a few times.
Final Thoughts
Your makeup sponges are tools that deserve respect and care. They help you look amazing every day. In return, they need to be kept clean and fresh.
The good news is that cleaning them is simple, cheap, and takes just minutes. You don’t need fancy products or complicated steps. Warm water and soap are truly all you need to get started.
Start with whichever method appeals to you most. Try it out. See how your skin responds. Most people notice their skin looks better and their makeup applies more smoothly within just a week or two of starting regular sponge cleaning.
Your skin is unique and deserves clean tools. Your sponges will last longer when they’re well-maintained. And honestly, clean sponges just feel better in your hands. They’re softer, bouncier, and more responsive.
So grab your dirty sponges right now and give them a wash. See the difference for yourself. Your future skin will thank you for starting this healthy habit today.
Happy cleaning!

Mary is a fashion enthusiast and lifestyle writer who loves discovering stylish clothing, accessories, and everyday fashion essentials. She enjoys researching the latest trends, reviewing popular products, and sharing practical style tips to help readers dress with confidence. Through FashionSolve.com, Mary provides honest recommendations, fashion guides, and inspiration for building a wardrobe that is both stylish and affordable.